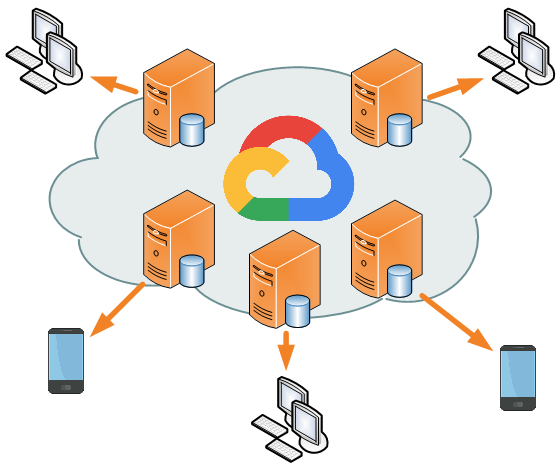
Create Your Own Content Delivery Network
For the last weeks, I have been on the lookout for a content delivery network to host all images for my website. Until now I have had all website image files stored on the same server as the web application itself, but as images have been added to the website the load time and memory use of the application has increasing.
For those of you that haven't heard of a content delivery network (CDN) before, it is basically set of server that your website can access to retrieve files, such as images and scripts. There are loads of CDN services to choose from which simplifies the process of distributing and managing servers - some of the more popular alternatives are CloudFlare and Fastly.
Choosing a reliable CDN can be of high importance, something that many companies learned the hard way, when Fastly went down for about an hour in June 2021. This caused many websites using Fastly as a CDN provider to crash, among those sites were Amazon, Spotify, and Twitch.
Although using an out-of-the-box CDN service can often be the easiest solution, we'll look into building our own CDN using Google Cloud Platform. This way you can increase your independence and create a cheap and reliable service yourself. It may sound like a big undertaking, but you will be able to set things up in no time!
Let's dive into it!
Google Cloud CDN
Before we get started in Google Cloud Platform, we need to create the GTM SS container. Head over to tagmanager.google.com and click on the 'Create Container' button.
As always, start by heading over to console.cloud.google.com. For this setup to work we will rely on a set of Google Cloud Platform services:
- Cloud CDN - Configure cache settings
- Load Balancing - Autoscalable servers distributed for fast delivery
- Cloud Storage - The storage system where your files are stored
- Cloud DNS - Configure domain settings (optional)
If you haven't done so, you need to create a project and link your billing account to the project.
We'll start by heading to Cloud CDN. Just type 'Cloud CDN' into the search bar to find the service. In case you haven't enabled Compute Engine API, you'll be prompted to do so. Just click on the 'ENABLE' button.
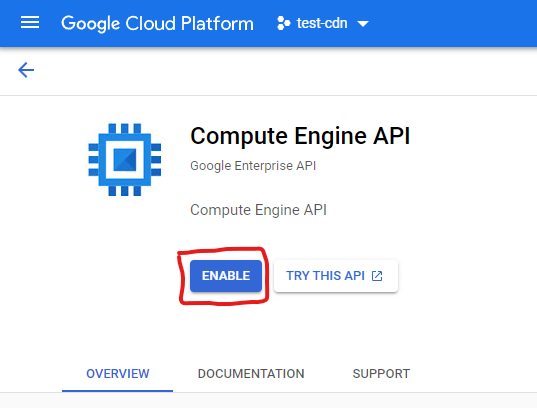
It's going to take a couple of seconds for the API to be activated. Next you'll see the start screen for Cloud CDN. Get started by clicking the 'ADD ORIGIN' button.
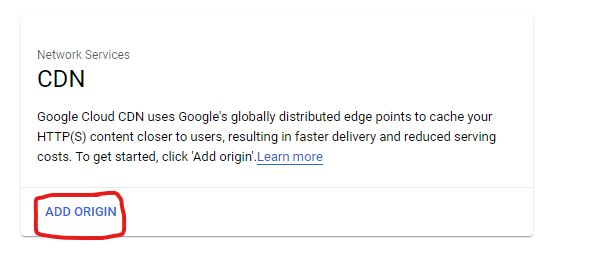
Adding an origin simply means that you'll add an application or object storage bucket (which we will use) that the CDN will use to serve it's content.
Next you'll be met by yet another screen. This time we are encouraged to prepare the configuration by completing two steps.
- Make sure that you have an existing HTTPS load balancer, or create a new HTTPS load balancer.
- Create a backend containing a Google Cloud Storage bucket, Instance Group or Network Endpoint Group.
Let's start by following the instructions in step 1, and create an HTTPS load balancer.
Creating a Load Balacer
Click on the link present in the 'create a new HTTPS load balancer'. You'll be redirected to this screen:
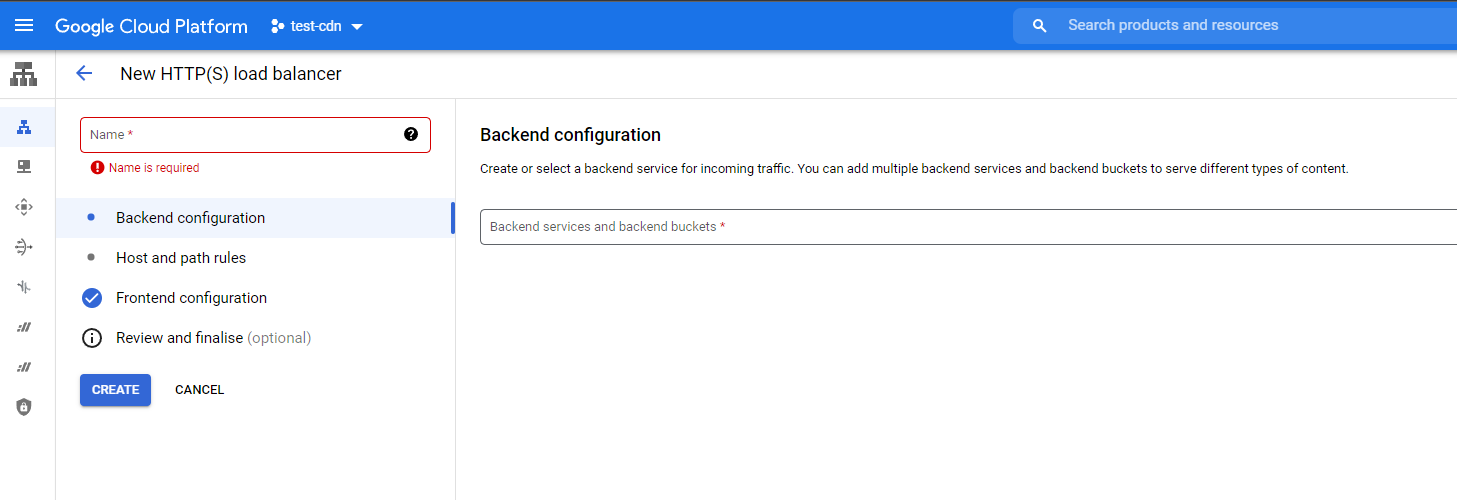
The load balancer will distribute scalable servers that provide fast delivery to the website visitors. When an end user requests files from the load balancer, it will localize the server closest the user and serve the content from there.
This is an important feature for a CDN, as serving content from a server nearby will reduce load times. Especially if you have a global website with traffic from all around the world.
Let's begin the load balancer setup by giving your load balancer a name. I named mine 'cdn-load-balancer'. Next, click on the bar saying 'Backend services and backend buckets'.
Load Balancer Backend Configuration
When it comes to backend for the CDN, we will be using a Cloud Storage bucket. This option is very easy to setup, but is somewhat limited compared to creating a custom backend application.
If you don't have time or expertise to build your own CDN backend (like me), a Cloud Storage bucket will handle the backend for you.
Select the alternative 'CREATE A BACKEND BUCKET'.
Assigning a Backend Bucket
You can think of the bucket as a file system that the load balancer will use to access files requestet from incoming browser requests. The bucket name is the root folder but you can create folders within the bucket to structure your files properly. Give your backend bucket a name and a description.
In the bar below, you'll be prompted to choose a Cloud Storage bucket where you will store your content. In case you already have a bucket that you want to use, you can select that one, otherwise click on the bucket symbol to create a new bucket. That is what I will do in this guide.
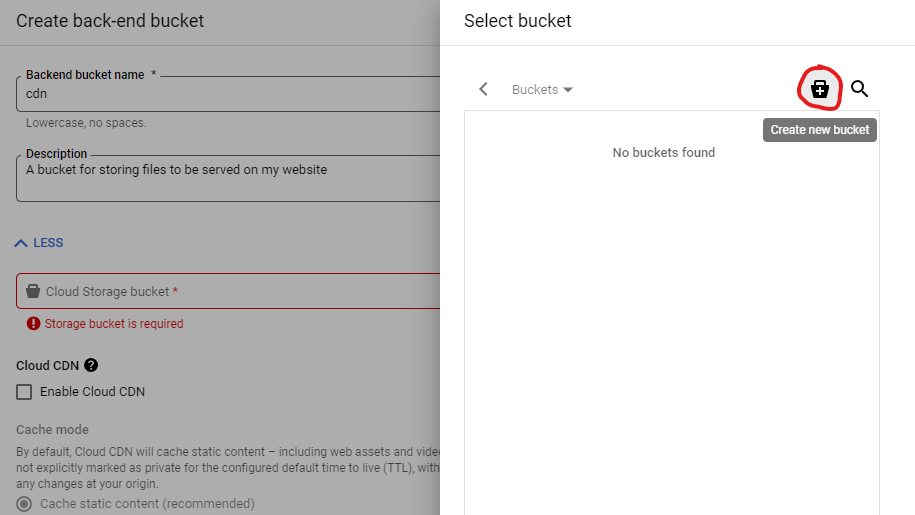
In case you create a new bucket, you will have to give it a globally unique name. I'll call my bucket 'oskar-cdn'.
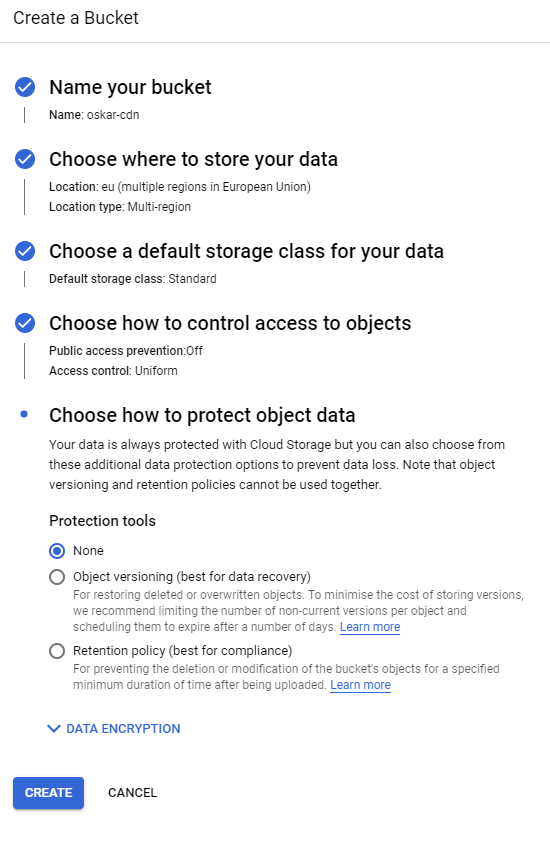
Select the location type of the bucket, i.e. where data is to be stored. As we want to serve the files in our CDN to people all around the world and want the files to be accessible as close to the users' locations as possible, I recommend using the 'Multi-region' option within the region closest to you. My region is the EU.
Next you will select the storage class of the bucket. There are different types of storage classes depending on how often the data needs to be accessed. Storage that can be accessed frequently is more expensive than other storage types (such as 'Coldline' and 'Archive') which can only be accessed a limited amount of times. Select 'Standard' as storage class.
The following setting is related to permission to access the files in the bucket. Here, we want the files in the bucket to be accessible for everyone visiting our website. Thus, we want to have a public bucket. As there is no public bucket option, we'll have to set this option manually after creation. For now, select 'Uniform' as access control which means that we will be able to use IAM permission on the entire bucket instead of per object basis.
Lastly, there is a setting for protecting file loss. It is possible to work with object versioning in the bucket, but this will add complexity. As the files I am to serve from the CDN won't be business critical (and to be honest, such files shouldn't be publicly accessible) I recommend selecting 'None' under 'Protection Tools'.
It's also possible to use your own encryption key, but I'll use the default Google managed encryption. All in all, my recommended settings look like this:
Click the 'CREATE' button.
Additional Backend Tweaking
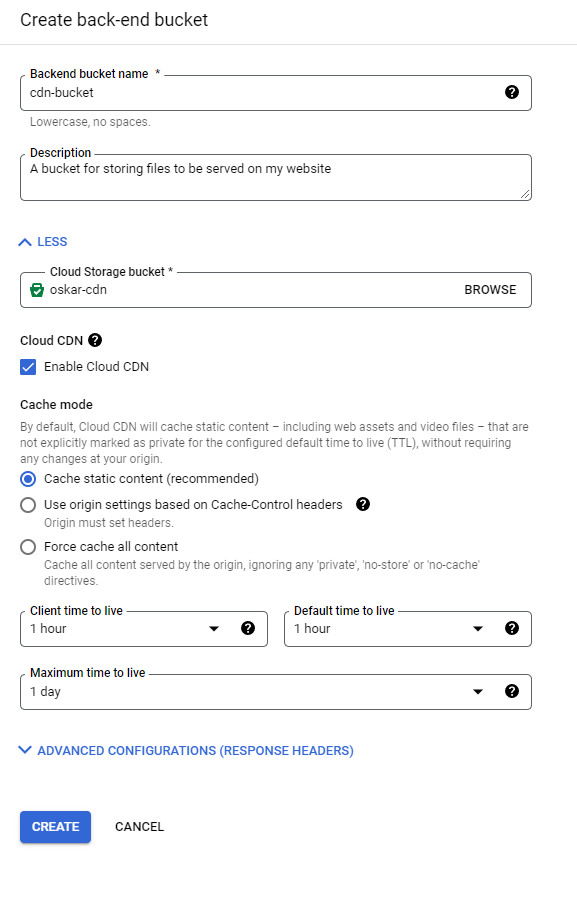
Now that the bucket has been created, select it as your backend bucket for the load balancer. After selecting it, the next option is a checkbox to enable Cloud CDN. Check it!
Cache settings will now become available, where you'll be asked how caching should work for Cloud CDN. You can choose the recommended setting which caches static content, use caching headers from incoming browser requests, or force cache all content.
As having to set cache headers for all the files loaded through the CDN would be very time consuming, I suggest using the recommended settings and let static files be cached automatically.
Next you can choose how long client time to live is (i.e. how long content is to be cached by the visitors of your site). I think the default option of 1 hour sounds fair, so I'll use that. The same goes for default time to live which decides for how long content can be cached by the CDN.
I'll leave the advanced options as is, as they are reasonable for my use cases. My settings are:
Click 'CREATE' and choose the newly created backend bucket as your backend configuration.

Load Balancer Host and Path Rules
Click on the second step in the list to the left 'Host and path rules'. Here it is possible to set rules that the load balancer will follow. These rules can be used to match certain subdomains or page paths to specific buckets. For example, you could have one bucket serving images mapped to the page path '/images/' and another bucket serving scripts mapped to the page path '/scripts/'.
In my case I will use one bucket for all purposes, thus no configuration is necessary in this step.
Load Balancer Frontend Configuration
Open up the third section of the list to the left 'Frontend configuration'. Here we can specify which IP address, ports and protocol to use for the CDN. If you expand the current settings by clicking on the downward arrow, you'll see that the current setup is relying on HTTP protocol and uses an ephemeral (dynamic) IP address.
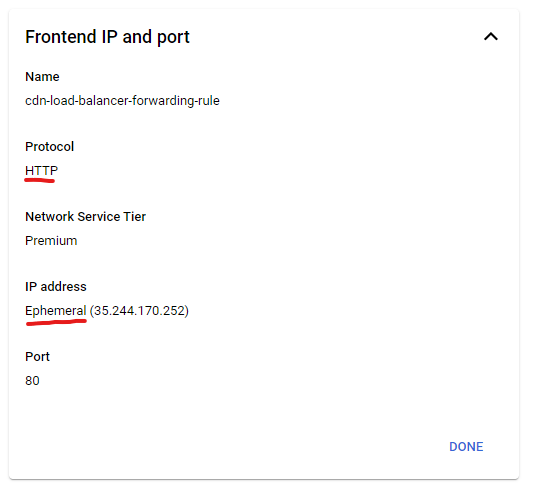
Both of these settings need to be changed for the CDN to work as intended. Remove the existing frontend configuration by clicking on the delete symbol.
Click on the 'ADD FRONTEND IP AND PORT' button. First give your configuration a name, such as 'cdn-frontend-configuration'. Thereafter change the protocol from HTTP to HTTPS. This will create an SSL certificate for the CDN and make the communication between the browser and the CDN encrypted. As the CDN will be used to serve content on the web, HTTPS is a requirement as the browser might otherwise warn the user that the connection to the website is insecure.
Change IP address by clicking on the drop-down list and select 'CREATE IP ADDRESS'. Give the IP address a name, such as 'cdn-ip', and click 'RESERVE'.
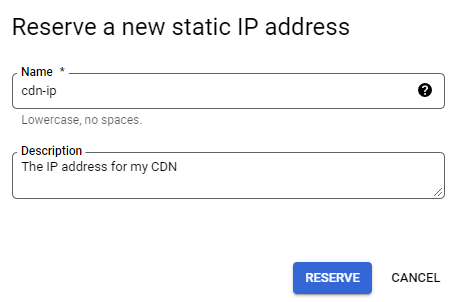
This will allocate a static IP address that can be used in your DNS settings to link the CDN to your domain. Using an ephemeral IP address will cause issues as the IP address can change, thus the link to your domain would be broken.
Lastly, we'll need to assign an HTTPS certificate to the CDN. Do this by clicking on the certificate drop-down and click on 'CREATE A NEW CERTIFICATE'.
Give the certificate a name of your choice. You can upload your own certificate, but I recommend using a Google managed certificate as this will work just fine. Thus select 'Create Google Managed Certificate' under 'Create mode'. Finally, add the (sub)domain that your CDN is to be mapped to. In my case I'll use the subdomain 'cdn.oskarholm.se'.
My settings are as follows:
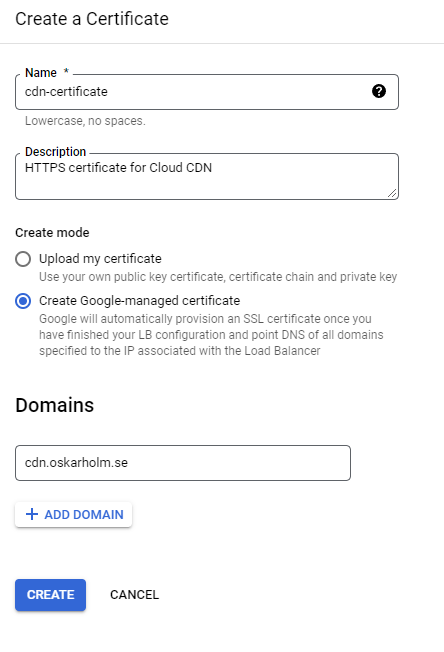
Click 'CREATE'. Your frontend configuration is now completed and should look like:
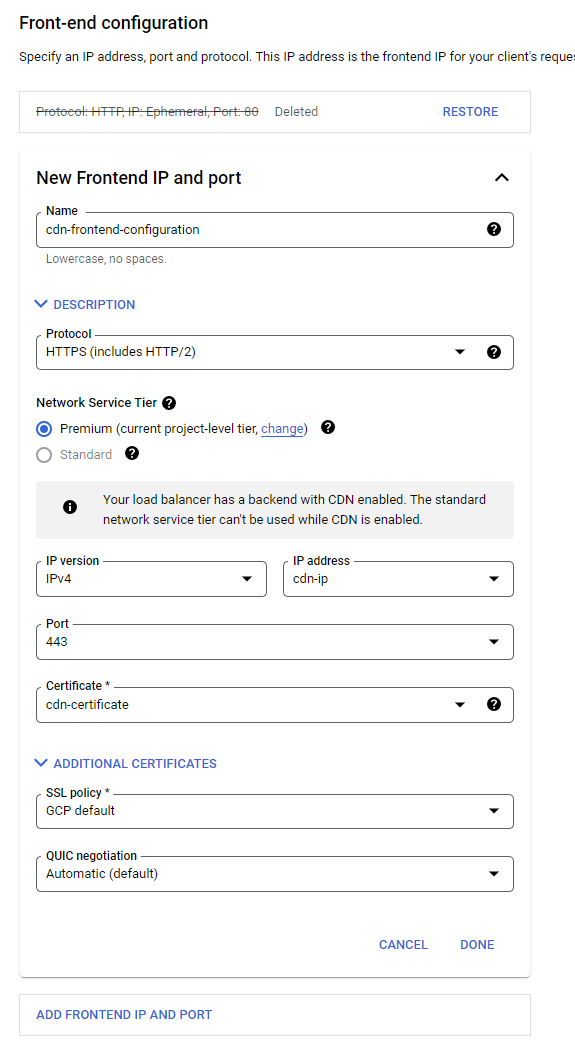
Click 'DONE'.
Review and Finalize Load Balancer
The load balancer is now set up. You can review all the configured steps under 'Review and finalise'. Check that everything seems to be in order, and then click 'UPDATE'.
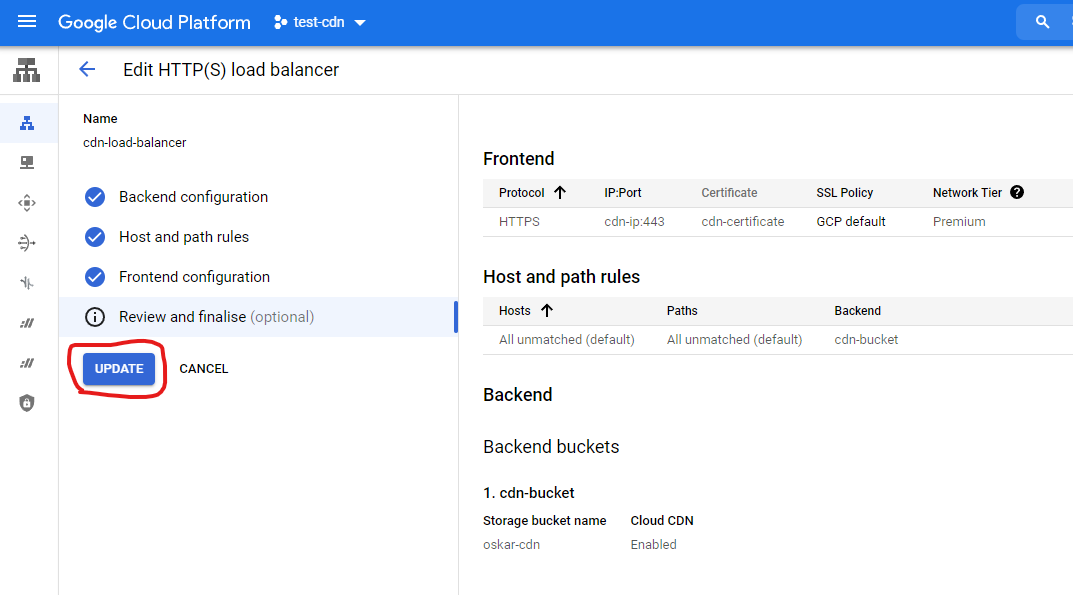
Map the CDN to a Custom Domain
We can now see the finish line. The last steps are to link the static IP address of the CDN to your domain. Depending on your hosting provider this step will vary. What you should do is create an A record (given that your static IP address is an IPv4 address). Thereafter we will add some files to our bucket and make them publicly accessible.
Have a look at your load balancer and you should be able to see its IP address. Ignore the last colon and the following numbers, that is the port - not the IP address. The static IP address that my CDN was allocated is '34.120.48.44'.
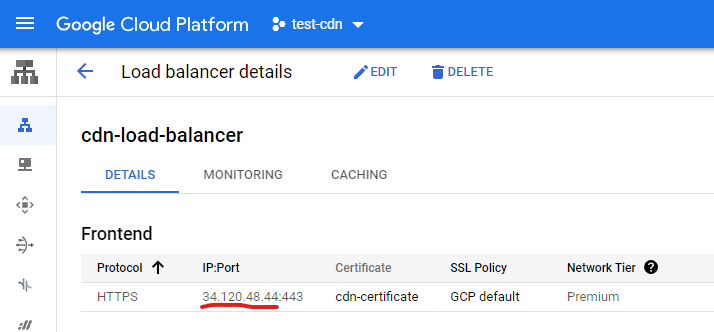
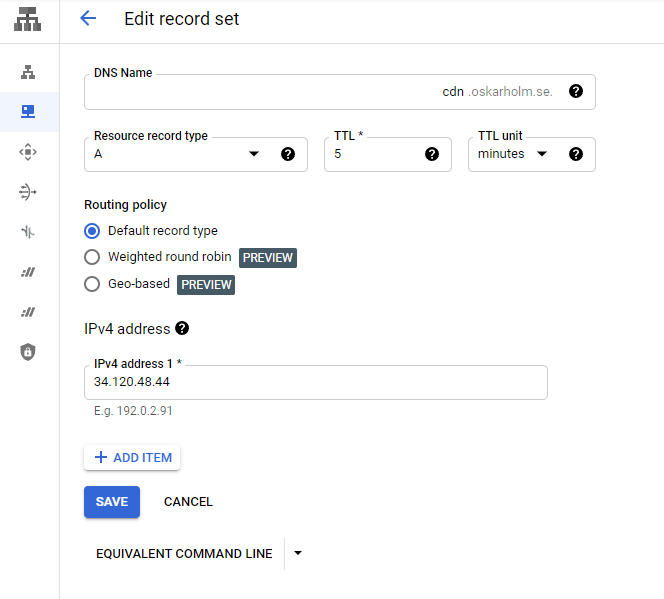
Copy the IP address, head over to your hosting provider and create a new A record. As I use Google Cloud as my hosting provider, I'll head over to Cloud DNS. From there I can create a new A record for the subdomain I chose for the HTTPS certificate creation.
Remember to use the same domain name! For me, the A record setup looks like this:
Making the CDN Publicly Accessible
With the A record set, we are ready for the last step! Navigate to Cloud Storage by opening up the left navigation panel and select the bucket you created as the backend for the CDN.
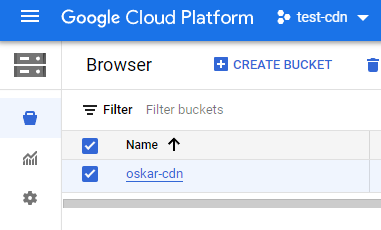
To the right side of your screen a permission section will open up. Click on the 'ADD PRINCIPAL' button.
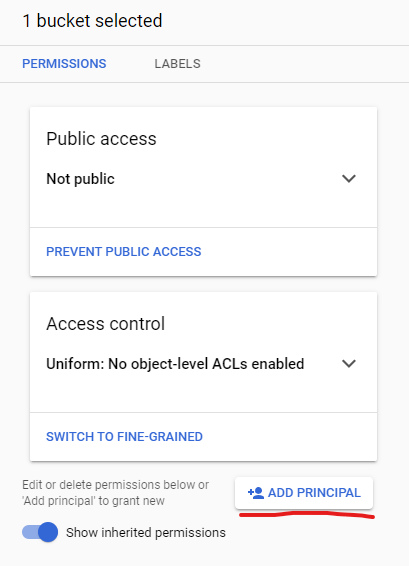
In the 'New principals' box, type 'allUsers'. Then open up the 'Select a role' drop-down menu, navigate to 'Cloud Storage', and choose 'Storage Object Viewer'.
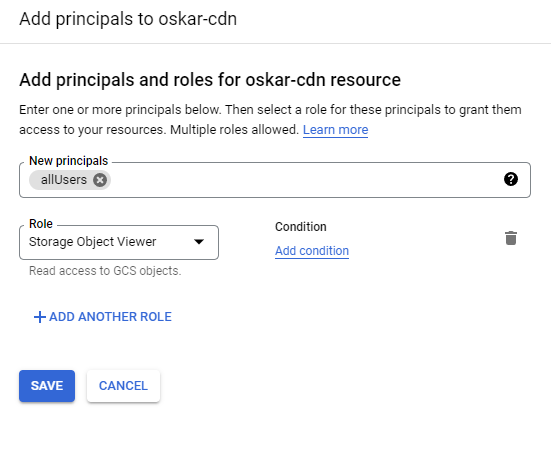
Make sure that you choose the object viewer role as this role will be granted to any user, and you do not want to give any user permission to modify or add objects in your bucket. Click 'SAVE'.
A popup will appear, and you have to confirm that you want to make the resource public. Click 'ALLOW PUBLIC ACCESS'.
Alright, great work! You have now created your own content delivery network. Awesome!
Testing Your CDN
To test that everything works as intended, upload a file to the bucket, such as an image file. You can just click on the bucket name, and then drag and drop a picture.
You should see the file name appear in a row within your bucket. The file I uploaded is named 'congrats.jpg'.
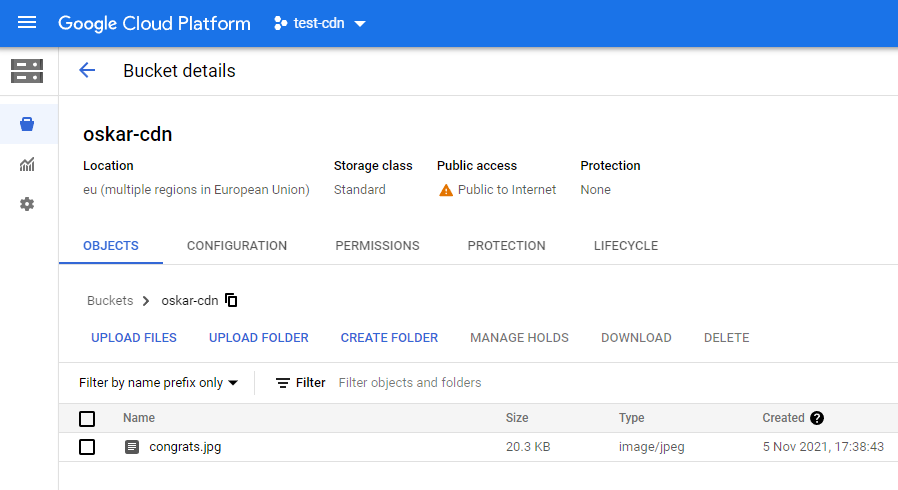
Now open up a new browser window and enter the (sub)domain of your CDN followed by a '/' and the file path. In my case the URL is 'cdn.oskarholm.se/congrats.jpg'.

Woohoo! It's working! As the file can be accessed from your custom domain, everything seems to be in order! Now the only thing left for you to do is adding all your files to the bucket, and make the necessary changes in your website code to load files from your own CDN domain.
I recommend structuring folder within your bucket, and not just drop all files in the root. For example, you can create a folder named 'images' where all images are stored. In that case, you simply add '/images' to the URL path, i.e. 'cdn.oskarholm.se/images/congrats.jpg'.
Final Advice
Before ending the post there are two things that I recommend you to check. The first one is to make an estimate of the price hosting your own CDN. Cloud CDN scales rather well, making it rather cheap even for low traffic sites.
For my website it costs around $0.5/day. There are definitely cheaper solutions out there, but I still find the cost reasonable. When it comes to sites with larger volumes, I recommend using Google's pricing calculator to estimate the costs.
The last thing I recommend you to check is to implement protection against malicious attacks. By default Load Balancing in Google Cloud Platform comes with Cloud Armor, which is a service that protects your CDN from threats, such as DDoS attacks. You can configure security policies, for example to blacklist specific IP addresses.
There is also a premium tier for Cloud Armor called 'Managed Protection Plus' that could be worth reading up on. I have not dived into all details of Cloud Armor, but I'm sure there are lots of configurations that could be useful.
In case you have any recommendations of how to set up Cloud Armor, please share your ideas in the comments!
So you might be wondering if I will be using my custom CDN with my recommended setup that I showed in this guide. Well... Actually I won't. Although it worked perfectly fine from a technical standpoint, the cost of $0.5/day is actually a bit higher than I'd like to pay as that is about the same amount that my website hosting costs per month.
Instead I decided on using JSDelivr which is a free CDN service that can fetch files directly from GitHub projects. Make sure to check it out if you're looking for a free CDN!
As always, thanks for reading! I hope that you found the guide helpful and interesting!

